This post for Christmas Tassels contains affiliate links. As an Amazon Affiliate, I make a small percentage when these links are used, at no additional cost to you.
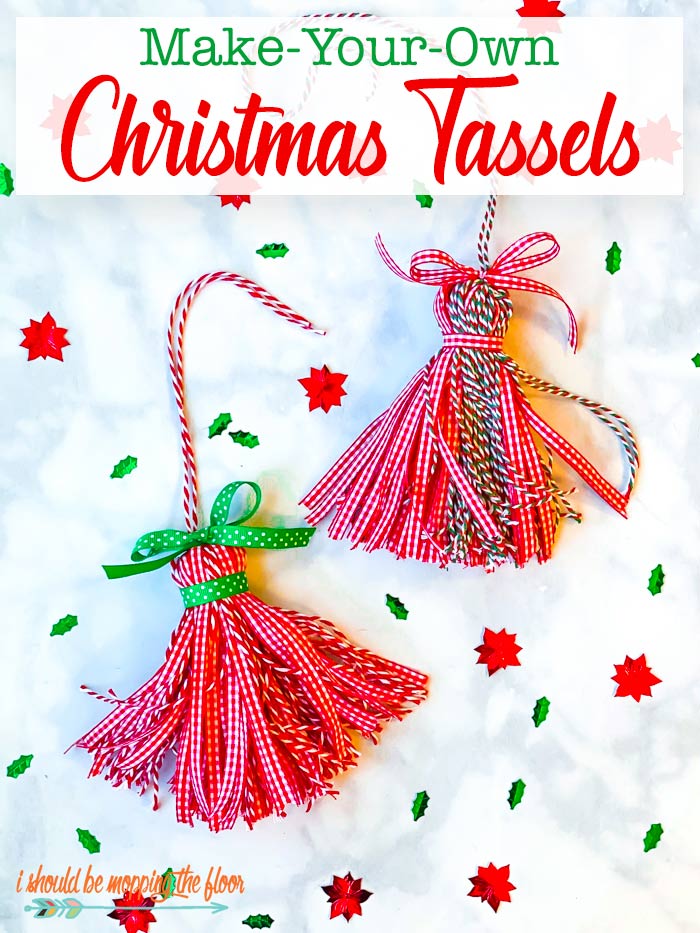
Y'all, these Christmas Tassels are my new favorite thing to make...I'm pretty sure all of our presents will have one attached this year. And they're really simple to customize. Check out how easy it is to make your own Christmas Tassels below.
Even as a teenager, I loved embellishing Christmas gifts. My go-to was usually attaching an inexpensive ornament to the bow so the recipient had a fun surprise on both the inside and the outside of their present. This year, I'm going with tassels...all the way! I even started hanging a few around the house for extra festive touches. See how simple these Christmas Tassels were to make below.
Christmas Tassels
I love tassels, but the really thick and full ones are so spendy (and, of course, those are the ones I love the most). So, I played around with my tried and true tassel maker and learned how to make jumbo sized Christmas Tassels using a combination of both baker's twine and ribbon (in fun holiday colors). They ended up costing just a fraction of what I would have paid in a nice boutique or gift shop.
And...not only am I sharing tassels today, but my friends are all sharing Christmas ideas, as well. It's all a part of our monthly Thrifty Style Team series. All of those projects are featured towards the bottom of this post.
As pictured above, not only am I using these Christmas Tassels for gifts, but I'm sticking them all around the house for extra fun (and lots of fluffy texture) this holiday season. Once you start making these, it's hard to stop!
How to Make Christmas Tassels
Although there are lots of ways to make tassels, I've really fallen in love with my little plastic tassel maker that I've had for several years now. I even have a video and tutorial on How to Make Yarn Tassels from a few years back that shares how to use this tool. But, I've explained it below, as well.
Christmas Tassel Supplies
- tassel maker
- I love this plastic one I grabbed on Amazon a few years ago (pictured above and throughout this post). It's very durable and I've made a lot of tassels with it...like, a lot!
- 1/4" ribbon (any thicker would be tough to work with on these)
- I grabbed the red and white gingham ribbon on Amazon here (it was actually for a fourth of July wreath, but I had a lot leftover).
- Look for lots of fun holiday colors!
- embellishing ribbon (optional), I used a thicker ribbon to cover the tie on the tassel
- baker's twine in Christmas colors
- crafting supplies: scissors, hot glue gun and glue
- Just a tip: if you don't use wired ribbon, your trusty fabric scissors are really nice for these tassels.
Directions for Christmas Tassels
The idea here is to make the tassel as thick as you can, by mixing the ribbon and the twine. You'll have to alternate between the ribbon and twine in the wrapping process so the final result isn't "clumps" of one or the other. You want them to look evenly spaced throughout the tassel.
- Because the twine is cheaper, I used more of it per tassel.
- Start by wrapping your twine on the tassel maker (again, you can check out my complete video on this here). You can choose the length of your tassel by deciding which "stair" to wrap your twine around on the tassel maker.
- Wrap it around the mechanism at least a dozen or so times (see photo below).
- This forms the "base" of the tassel.
- Above, you can see the thickness of my tassel's base.
- Cut off your twine and start with your ribbon.
- Loop it around a dozen or so times, as well.
- Then, switch back to the twine. Repeat the layering process.
- I did about five layers total...three of twine and two of ribbon.
- The twine was on the outside layer.
- Even if it feels too thick, it's not. The thicker the tassel, the fluffier and more playful in the end.
As you can see above, that last layer, I really tried to spread out the twine so it blended well with the ribbon. I didn't want the entire outer layer to be twine only.
- You'll tie the tassel on the very top with a small piece of twine that you thread under the entire piece then shimmy to the top (as pictured above with that tie in place).
- You'll also loop another length of twine through the slit to tie up the main part of the tassel (you can see me doing this in the above photo).
Slide the tassel off the maker.
Then be sure to cut the tassel through the loops at the end to make it an actual tassel. I like to fluff it as I go.
This is optional, but I hot glued a small piece of ribbon over the main tie to dress it up a bit. I played around with different ribbons on all the tassels I made to create different looks. I also made a small bow with more ribbon and hot glued it on the very top of some of my tassels, too, for extra fun.
You can see above how the twine and ribbon look so fun together! I added this one to a ginger jar in my entry way.
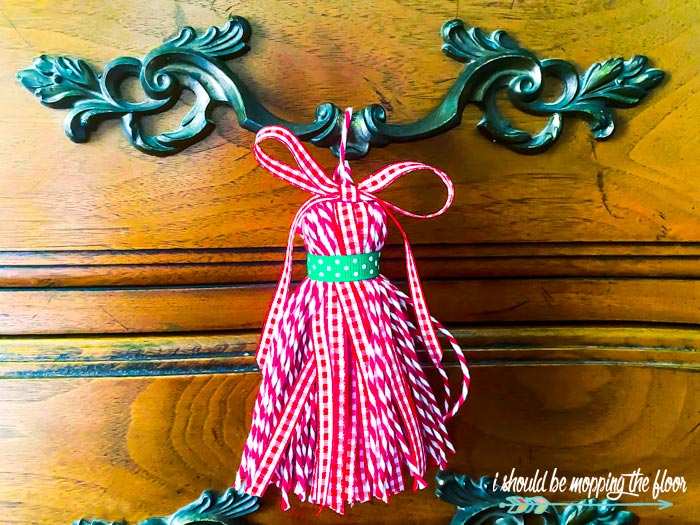
I'm also enjoying them on drawer pulls, too, as pictured above. I honestly can find so many spots for a cute tassel. Where would you hang yours?
Thrifty Style Team
And, as I mentioned above, today is our monthly Thrifty Style Team day. My blogger friends and I have put together a fantastic line-up of thrifty, budget-friendly holiday ideas for you. Check them all out below...and tell my friends I sent ya!
- Redhead Can Decorate - 25 Affordable Thrifty DIY Christmas Decorating Ideas
- The Painted Hinge - Vintage 7UP Crate Christmas Centerpiece
- DIY Beautify - How to Make a Glitter Ornament Nativity
- 2 Bees In A Pod - Stamped Book Stacks For Christmas
- Postcards From The Ridge - Easy DIY Snowman Wreath
- The How To Home - Copper Geometric Christmas Ornament
- The Tattered Pew - Easy Homemade Christmas Soaps For Kids
- What Meegan Makes - Glittery Christmas Wreath From An Embroidery Hoop
- Cottage At The Crossroads - Wooden Chinoiserie Christmas Ornament
- I Should Be Mopping The Floor - How To Make Christmas Tassels
- Lora B Create & Ponder - DIY Repurposed Candlesticks with Sheet Metal Shades
- White Arrows Home - DIY No Sew Christmas Pillow
Who is ready to make some fun tassels, now?


I think these would look great on a simple greenery wreath. Tied all around the wreath, the bigger and fluffier the better. Fun project!
ReplyDeleteThat's such a fun idea! Thanks so much. xoxo, kristi
DeleteSuper cute! I absolutely love the gingham ❤
ReplyDeleteThank you so much, Cindy! I'm such a sucker for that pattern. xoxo, kristi
DeleteThis is such a great idea. I love that tassel maker and have never seen one of those before. Going to have to get one!
ReplyDeleteThank you so much, Angie! I use that thing more than I thought I would. Have a great season! xoxo, kristi
DeleteI had no idea a tassel maker even existed; slick! Love how you combined the twine and ribbons; so festive. These would be so fun as an extra touch on a gift! Great tutorial!
ReplyDeleteThank you so much, Lora! I really appreciate that. They're kind of addictive to make. xoxo, kristi
DeleteThese are so fluffy, festive, and beautiful, Kristi! I love them.
ReplyDeleteThank you so much, Mary Beth! I really appreciate that. xoxo
DeleteI'm now wanting a tassel maker! I love the combination of twine and ribbon that you used. Anyone who gets one of these from you this Christmas is going to be so happy!
ReplyDeleteAwww...thank you so much for that, Paula! I really appreciate it. xoxo
DeleteI gotta join the rest here as far as not knowing a tassel maker was a thing. I'm totally going to get one now because I adore these and want to make a bunch of them!
ReplyDeleteThanks a bunch, Michelle! Yes, they're definitely game-changers! xoxo, kristi
DeleteI just love the various strings and ribbons. It looks whimsical and perfect for a fun Christmas decoration or gift wrapping. You have the cutest ideas, Kristi.
ReplyDeleteAww, thank you, my sweet friend. I really appreciate that. Have a lovely Christmas season, Meegan! xoxo
DeleteKristi I love these tassels! The ribbon you chose is perfect and I think they will look great as decor or on your presents. Beautiful!
ReplyDeleteThanks a bunch, Kelly! I really appreciate that. xoxo, kristi
DeleteLove your tassels! I didn't know that a tassel maker existed so I'm putting one in my shopping cart! I've never seen the butcher's twine combined with ribbon but I really like that combination!
ReplyDeleteThank you so much, Jane! Yes, that was kind of a random combo, but I was so happy it worked out. Have a lovely season, friend. xoxo
DeleteSuch a cute idea! Love thinking of all the ways to use this pretty DIY!! Thanks for the inspiration!
ReplyDeleteHave I ever told you how much I love your photography! It's one of the best, Kristi!! These tassels are so cute!! I totally want to try it!!
ReplyDelete