This post for Hand-Poured Candles contains affiliate links. As an Amazon Affiliate, I make a small portion when these links are used, at no additional cost to you.
I've tried my hand at homemade candles in the past, but these new fall versions of hand-poured candles may just be my favorites...because of how easy they were to create and how lovely they smell. If you've never made hand-poured candles, they're not nearly as intimidating as you may think. Nor are they very messy. See my simple tutorial below.
I tend to utilize candles more in the cooler months...they provide that warmth and glow that is perfect this time of the year. But, I use them so much that my candle budget has started shaking its finger at me. I always try to purchase them when White Barn (the Bath and Body Works candle store) has them on sale, but I truly go through them a bit too fast to even justify that. So, learning to make my own hand-poured candles has been a game-changer in this area. I can create these for a dollar or so apiece and have a more customized scent. See how simple these are to create below.
Also, today is THRIFTY STYLE TEAM DAY! Yay. At the end of the post, I'm sharing projects from all of my friends...and they're SO good!
Hand-Poured Candles
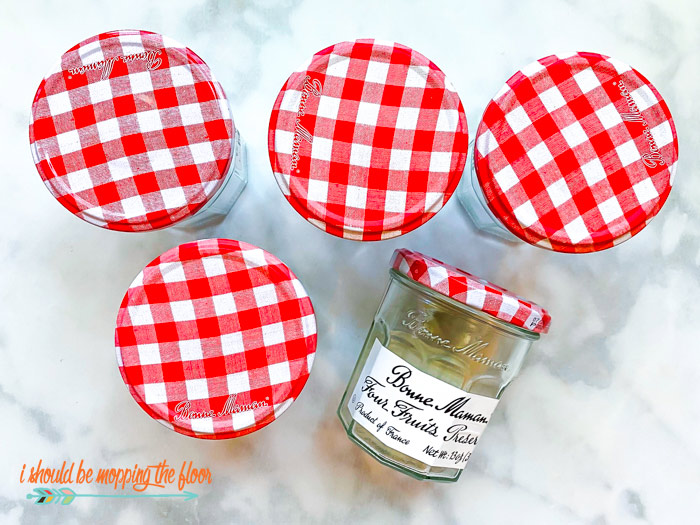
Not only did this latest little candle-making experiment come out of *necessity*, it also stemmed from an over-abundance of jelly jars that I just can't bring myself to toss. If you're a Bonne Maman jelly fan (we can't get enough), then you may have one or two of their adorable jars on hand, too. And if you don't, any glass container will work for making your own hand-poured candles. Below, I used a vintage glass from my mother.Why Make Your Own Hand-Poured Candles?
- complete control of scent type
- complete control of scent strength
- This is important to me for a variety of reasons. In larger rooms, I prefer a more heavily scented candle. But in places like a powder room, I prefer barely any scent since it's tight quarters.
- upcycle old vessels
- cost effective
How to Make Hand-Poured Candles
There aren't really a whole lot of fancy items needed here. I grabbed a kit of sorts on Amazon and had everything else on hand.
Also, the traditional method of making candles uses a double boiler on a stove top. However, if you've been following along with me on Instagram lately, you know my kitchen is in the remodeling process (it is actually supposed to be finished today!). I did a bit of research and found out that a microwave can be used. I know it's not the traditional form of candle-making, but it worked well for me. I haven't had any scent or wax issues whatsoever with this fall batch I made in the microwave.
Supplies for Hand-Poured Candles
- soy candle wax (I like the Hearts and Crafts brand from Amazon here. It comes with wicks and wick centering tools.)
- I prefer soy because it burns very clean (the jars don't get black soot all over them).
- And I ordered quite a lot of this (10 pounds), but if you're just starting out on making candles, a five pound bag is more than enough (I linked it above on Amazon, also available through this link).
- candle wicks (Again, I recommend this kit from Amazon that has wax, wicks, and centering tools.)
- wick centering tools (These come in the kit, but you can also use popsicle sticks, chop sticks, or similar.)
- jars or other vessels that are safe for candles (tea cups make super sweet candles)
- I use our old Bonne Maman jelly jars. If you've never tried Bonne Maman preserves, you definitely need to. Our family's favorites are the Fig Preserves and the Strawberry Preserves.
- instant-read food thermometer
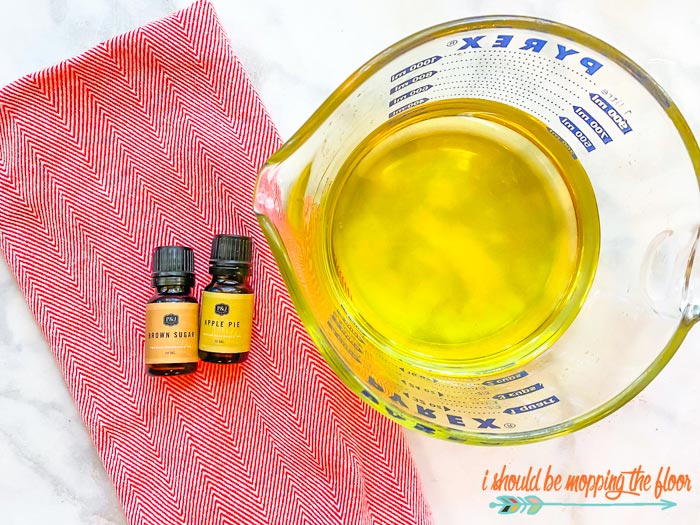
- candle scents (fall ones are especially nice right now)
- I used this pack of Cozy Home Scents from Amazon.
- You can also use essential oils, but keep in mind that you'll need quite a lot of them, so cost may be a factor. I've made many hand-poured candles using this particular lavender oil since it is budget-friendly and a really large size. I use an entire tablespoon of it in one candle because I like a heavily-scented lavender candle in my bedroom. And it's not a powdery lavender smell which is what most lavender candles seem to be these days.
- double boiler for stove prep or large, 4-cup glass measuring cup for microwave prep (it's okay if it's one you use in the kitchen, I have a trick for cleaning out the wax that I shared below)
- hot pads or oven mitts
Directions for Hand-Poured Candles
- Start by cleaning out the container you plan to use.
- The labels on these Bonne Maman jars come off with a quick soak in a sink of warm water and a bit of dish soap...no scrubbing even required (usually all the labels float to the top of the water if you do several at a time).
- Allow to dry completely.
- Place your wick in the bottom center of your container.
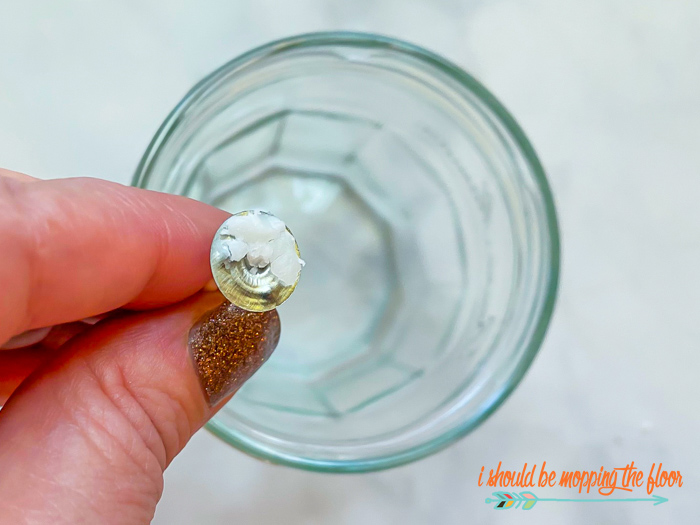
- I warm a tiny bit of the soy wax between my fingers and stick it to the bottom piece of the wick to get it down (pictured above). This isn't fool-proof, it still sometimes wiggles free during the actual pouring part, but it's simple to straighten out.
- Place your centering piece over your container to keep your wick centered when the wax is poured.
- For one eight ounce jar, I used roughly two cups of soy wax (in the non-melted stage) in my glass jar (or inner pot of your double boiler).
- If microwaving, do so in 30 second intervals on high, stirring after each time. It only took me two minutes total for all of the wax to melt. I made sure it reached 165 degrees (it will continue to get a bit hotter once removed from the microwave).
- If doing on the stovetop, stir and melt your wax to 165 degrees.
- Once your wax is between 165-185 degrees, add your fragrance. This time around, I did a mixture of apple pie and brown sugar scents. I used two teaspoons of apple pie and one of brown sugar, but that is actually quite heavy on the scent (I prefer that). You'll probably need to play around with the amounts to get your own preferences down.
- Stir until fragrance is incorporated. I just used a plastic spoon.
- Pour your wax into your glass containers.
- If there is any wax left in your pouring container, save it until the next day.
- Allow your candle to firm up overnight.
- Once it's firm, if there are any holes or marks on the top surface, you can melt a tiny bit more wax and fill them in. This is just optional for those who like that smooth top.
- You can now wash the pouring container. If you want to use it for other items (other than candle-making), leave about a half an inch of wax in the bottom of it. Place the container in the freezer for a few hours and the wax should pop right out.
- Trim your wick to about a half an inch.
Pair a fall-scented candle with one of my free printable acorn design gift tags for a sweet treat for a friend this season.
Thrifty Style Team
And don't forget...it's everyone's favorite day of the month, Thrifty Style Team Day! Below, all of my friends have loads of great (budget-friendly) ideas, too!
- Redhead Can Decorate - Thrifty Glass Fountain
- The Painted Hinge - Mixing Natural and Faux Elements on a Fall Mantel
- DIY Beautify - Decorating with Inexpensive Amber Glass Bottles
- 2 Bees In A Pod - Chalk Painted Rocking Chair
- Postcards From The Ridge - Fall Table with Thrifted, Gifted, and Foraged Finds
- The Creek Line House - The Secret Formula for the Perfect Painted Gold Frame
- The How-To Home - Painted Dollar Store Pumpkins
- The Tattered Pew - DIY Faux Pumpkin WIth Floating Votives
- Sweet Pea - Amazing Ideas for Fall Outdoor Decor
- What Meegan Makes - Unique Fall Decorating with Vintage Pieces
- Cottage At The Crossroads - How to Disguise a Chest Freezer

Have you ever made your own candles?


Those jars are adorable! I can totally understand why you don't want to part with them and this is such a wonderful way to use them. Thanks for the tutorial and the inspiration, Kristi. xo
ReplyDeleteI've never seen that brand of jelly but I'm going to be looking for it. The jars make a perfect candle holder. As I enjoyed reading your tutorial I was envisioning me smelling them through my computer screen. I'm hoping to try this project very soon!
ReplyDeleteI love using candles, especially in the fall. And those jars are adorable! Thanks so much for the tutorial!
ReplyDeleteI have always wanted to try my hand at candles and I have a ton of those jelly jars! Thanks for the directions and inspiration! Oh and your tags are so cute too!
ReplyDeleteI haven't ever made candles, but you make it look so easy, I need to give it a try.
ReplyDeleteThe Fall scents sound really good.
Thanks, Kristi.
I love this so much I bought the candle making kit through your link! I have a ton of essential oils and I love that I can make my own candles that don't contain any questionable chemicals. Pinning!
ReplyDeleteKristi, This tutorial is so helpful! I love your mom's glass for the candle! They would sell like hot cakes in the store!! I shared on my FB page and folks love it, too!
ReplyDeleteI had some of these products already in my Amazon cart debating to buy them or not. Your step by step tutorial gave me the push to purchase it plus a few of your suggestions!! Thank you so much!!! I cannot wait for it all to arrive tomorrow!
ReplyDeleteHow exciting! I hope you love them all! xoxo
Delete