This Indoor Herb Garden post and its shop have been compensated by Collective Bias, Inc. and its advertiser. All opinions are mine alone. #ThinkOutsideTheWipe #CollectiveBias
Our new Indoor Herb Garden is housed in our sunroom for year-round enjoyment. While it's just a "starter garden" at this point, I anticipate upsizing it down the road and enjoying fresh herbs for years to come. Come see how we put this together below...it was a fun family project.

Since moving to our new home last year, we've missed our herb garden we had at our previous place. It was actually a series of whiskey barrels with basil, rosemary, thyme, and mint spilling out...and it was wonderful. I'd send the kids out with a basket and scissors to grab fresh herbs for dinner. I also became the crazy herb lady that brought baggies of our bounty to everyone she knew...we always seemed to have a bumper crop of mint and rosemary!
We've finally figured out a way to create an herb garden over here...and this time it's inside (so we *hopefully* won't have to replant every single year). Come check out this lovely (and tasty!) addition to our sunroom.

To keep things from getting too crazy messy, we kept Huggies® One & Done® Refreshing Wipes on hand. We're quite a few years past the diapering stage, but these wipes are great for so much more. They're thicker with their patented Triple Clean Layers that get the job done for an ultimate clean. We appreciate the EZ Pull® Dispensing that's perfect when your hands are messy and you only want to pull out one wipe. And these handy soft packs are great anywhere and everywhere. Click on the above photo to grab a box!

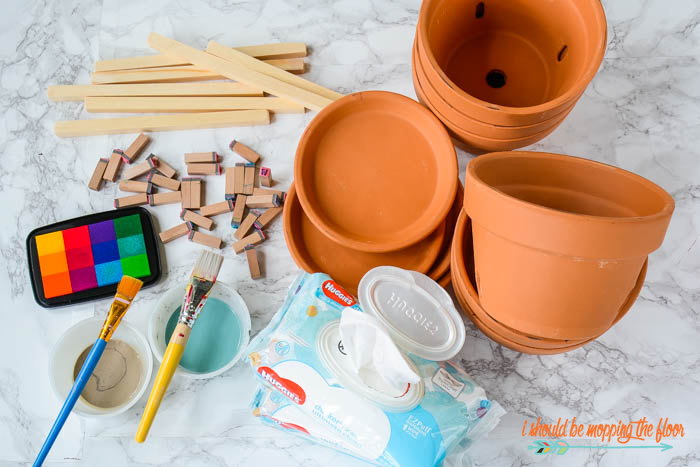
For this indoor herb garden project, we grabbed the following supplies:
- terra cotta pots and saucers
- 1/2" square dowels for markers (we cut ours to 9" lengths)
- chalk-style paint, pickle wash-style paint
- paint brushes
- rubber letter stamps and stamp pad
- Huggies® One & Done® Refreshing Wipes for easy clean up.


And did you know that Sam's now offers curbside pick up? It's an absolute DREAM, y'all. Click here to check it out.

We started by just painting the bands on the pots to give them a pop of color and make them coordinate with our aqua decor a bit more. Using a chalk-style paint helps it go on easily.

I shared my pickle wash method here a couple of weeks ago, if you like this finish.
It's simple enough that my kiddos can do it.


After the plant is secure in the pot, we stick in the corresponding plant marker.

While our plants are pretty small, I do anticipate replanting into larger pots, maybe next summer or so. I want to see how well things do in our sunroom before I go whole-hog on this indoor herb garden. The pots I chose are a nice, manageable size for us. Our sunroom was the perfect spot, too. It's been kind of bare bones since we moved in. It's not temperature-controlled, so it can get a bit warm in the summer. But, it's not bad in the winter with how mild the temperatures are here in Texas.

I've already used the basil and chives in cooking some meals this week.


I'm offering this fun free printable as a bonus item to this post to all of my newsletter subscribers. It coordinates with any kind of garden or kitchen area and has a fun, farmish vibe to it. Click here to sign up for my emails (these come every time a new post is live...it's different than my Saturday newsletter). The link will be in today's email to retrieve this print. Or, if you miss the email today, you can find it in the next email, later this week.
Where would you put an indoor herb garden?


Your indoor garden looks beautiful! I've always wanted one but am afraid I have no idea how to take care of the herbs. I love how you just painted the tops, too. Very elegant! #client
ReplyDeleteThis is awesome; plus it makes a great family project.
ReplyDeleteFun project. Thanks for sharing at the Inspiration Spotlight party. sharing
ReplyDelete