This DIY Raised Dog Feeder tutorial contains affiliate links. I make a small percentage when these links are used, at no additional cost to you.
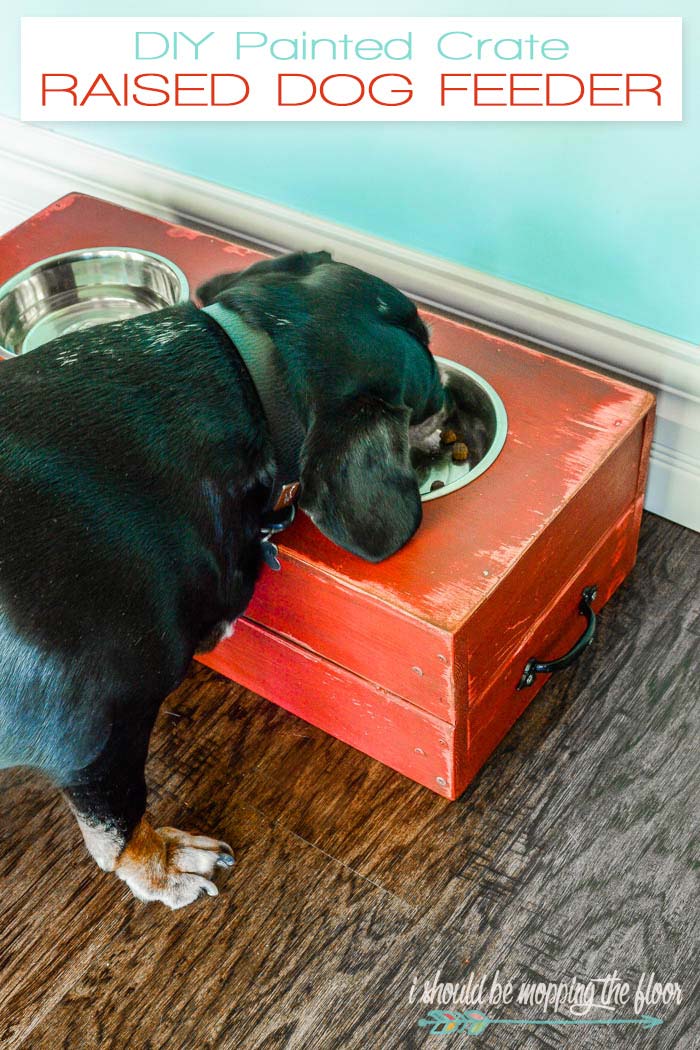
Our Chloe is loving her new DIY Raised Dog Feeder. And we're loving that her bowls no longer clank against the walls while she's eating or drinking. Chloe is also a bit ornery and picks up her bowls in her mouth to deposit in unknown locations . Much to her dismay, this feeding station has brought that little shenanigan to a stop. Check out how we made this DIY raised dog feeder below.
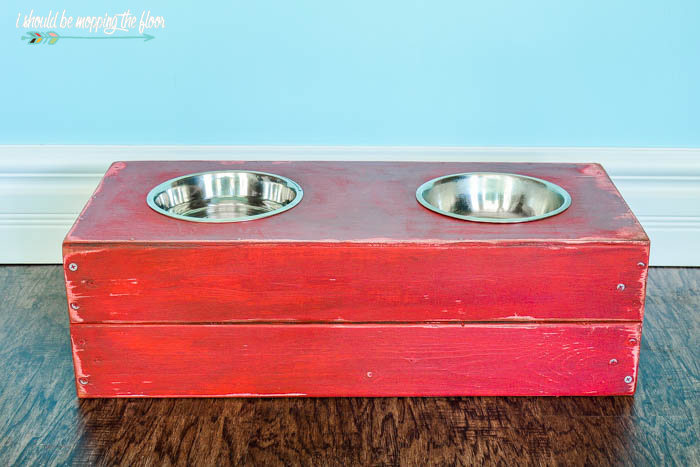
This new DIY raised dog feeder was actually really simple to create. And it keeps Chloe's feeding area a lot more tidy. See its complete tutorial below.
DIY Raised Dog Feeder
Can you guess what this started from? This fun little box was one of the crates my dad and I constructed here on I Should Be Mopping the Floor almost five years ago (see its original tutorial here). But truly, you can use any type of crate (store-bought or handmade) to create this DIY raised dog feeder. I linked to a few ready-made crates below, as well. When we moved to our new home, our pantry was significantly smaller and didn't accommodate all of those crates. But, I was glad to find a good use for them, starting with this dog feeder.
I talk about Chloe on here quite a bit. She is our seven-year-old Standard Dachshund. Chloe was actually a rescue dog that we adopted two years ago. She's been such a wonderful part of our family.
Why Use a Crate?
I actually looked online for plans for a DIY Raised Dog Feeder. While they all looked really nice, I wanted something a bit less time-intensive (building-wise). Using something on hand that was already the perfect height was such a great solution. Any wooden box or crate would work great for a feeder station.
How to Make a DIY Raised Dog Feeder
Supplies:
- crate (Again, we started with a crate we had on hand).
- The only thing to remember here is to make sure your crate is wide and deep enough to fit your dog's food and water bowls.
- A couple of pre-made crate options:
- IKEA carries a great pre-made crate (I used it for these crates here)
- I found another wooden crate here on Amazon.
- stainless pet bowls with a lip (make sure they'll fit the size of the bottom of your crate)
- compass
- drill/drill bit
- jigsaw
- sandpaper
- painting supplies or stain
Directions:
- Measure your dog's bowls on the inside of the top of the bowl. This is important...you'll need the bowl's lip to hold it in place in the feeder, so be sure you're measuring on the inside diameter.
- We used a compass to trace out the bowl diameters on the bottom of the crate (which will now become the top of the raised dog feeder).
- Be sure to space your bowls evenly on your surface (we measured each way to get the mid mark of each side of the crate...then drew each circle in its own area).
- We made a lead hole with a large drill bit. Then we cut out each hole with the jigsaw.
- We sanded the raw cut parts just a bit before painting the DIY raised dog feeder.
Weathered Chalk Paint Technique
You can now finish your DIY Raised Dog Feeder however you'd like. I am sharing the weathered chalk paint technique below, in case you'd like to do something similar.
Supplies for Painting Technique
- Since my crate was already white, I wanted to paint it to where the white showed through a bit in a weathered manner. If your crate is unfinished, you may want to give it a base coat of whatever color you'd like to show through the weathering process.
- I rubbed the edges with a bit of hemp oil before applying a red chalk-style paint to all of the outside surfaces of the dog feeder. I honestly could have just left it white...but, where's the fun in that, right? The hemp oil acts as a barrier so the paint doesn't adhere to the parts where it's applied.
- After the red chalk paint was completely dry, I sanded the edges so that white paint would show through a bit. I used a course-grit sand paper for this.
- I used my dark wax and wax brush to seal the entire piece and weather it a bit further. I actually did two coats of wax since, inevitably, water would get splashed on the surface of this piece from time to time. The wax just protects it a bit from all that sloshin'.
- If you apply too much wax, just keep working it a bit. It helps to have natural wax on hand, too, to pull off the darker color, if need be.
- We just slipped the bowls into their spots and it was ready for action.
- You can also add felt strips to the bottom of your dog feeder to protect your floors, if you'd like.
Chloe is actually a Standard Dachshund, so her stature is significantly taller than the more widely known miniature Dachshund. This DIY raised dog feeder is better for her back so she isn't stooping to have access to her food and water. We also store extra dog toys under the crate, since there is plenty of space.
More Easy DIY Projects
- Our DIY Garbage Can Storage Area is another simple DIY project that packs a big (oranizing) punch. It goes together in a couple of hours.
- And this DIY Drink Station is another one that just requires simple cutting and a bit of paint. It's perfect for outdoor entertaining.
- This DIY Nightstand Into Flower Planter is so fun! Julie, from Redhead Can Decorate, always has such great ideas.
- And this DIY Desk Organizer from The Kim Six Fix is so clever!


These are so great! My husband made a similar one for our dog and we love it as much as our fur baby does! Pinned to share :)
ReplyDeleteThis is a great idea, Kristi. I'm sure my little dog would appreciate a raised dish. And Chloe is adorable!
ReplyDeleteI'm visiting from Wine'd Down Wednesday.
~ Megin of VMG206
Nice, but I'd notch a little grove when cutting the holes to make it easier to get a finger under the lip to raise the bowls out for daily use, refill water, etc.
ReplyDelete