This shop has been compensated by Collective Bias, Inc. and its advertiser.
All opinions are mine alone. #SpringCreations #CollectiveBias
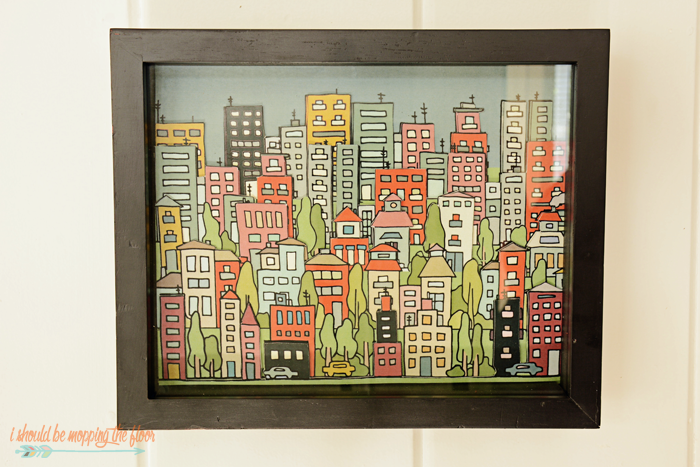
This DIY 3D Artwork was so much fun to put together. I've got the step-by-step tutorial for you below, complete with the free printable background that creates this piece. It's the perfect addition to your home decor.

This DIY 3D Artwork is perfect for our new home...we have some wall space we need to fill up and this was an inexpensive and FUN way to do so. I was inspired by my husband's love of Brooklyn as well as our friend's layered artwork that was in her home years ago when we hung out there a lot (hi, Amber!). Check out this tutorial and download the city background to create it.

I love a good piece of jumbled up cityscape artwork...with buildings stacked deep and loads of fun colors. The neat part of this one is that the buildings are even layered between their stacks with mounting tape to make them really pop! I've been wanting to make something like this for years. One of our friends from our west Texas days had some amazing James Rizzi artwork in her living room and I was always drawn to the colors and pop effect. I created this piece of art myself, but it's definitely inspired by James Rizzi art. Mine is a bit less abstract and along the lines of the Brooklyn skyline (or at least my perception of it...ha!)...and a little more our style. This will be a fabulous father's day gift for the husband (the Brooklyn fanatic!).

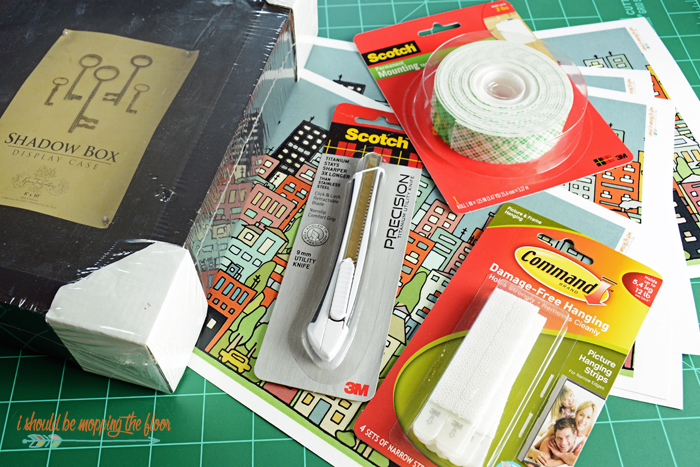
For this craft, you'll need:
- 8x10 shadow box frame
- 5 copies of my free printable background (below), printed on cardstock
- Scotch® Brand Utility Knife
- Scotch® Brand Permanent Mounting Tape
- Command™ Picture Hanging Strips
- self-healing cutting mat (or even a cutting board)
This graphic was so fun to put together and "stack". I actually pulled the colors of it from a bathroom hand towel to coordinate it to hang in there...but now I love it so much, I kind of want it in a more prominent spot. You will want to print five copies of this free printable onto card stock.

I like to work from back to front. I trim all of my white borders away from all copies. Then, I use the Scotch® Brand Utility Knife to cut out the "top" layers of buildings from the sky.

I go back and "clean up" all of the stray pieces of paper "hairs".

Continue on each copy of the skyline, outlining and cutting each out. Feel free to take creative liberties on which buildings to "recess" and which to keep up front. You can cut in any building outline formation you desire...it's definitely fun to get creative. Feel free to use more than five copies if you'd like even more depth.

Your fifth copy of the free printable background will remain uncut. Above are the four cut copies I created. Grab your Scotch® Brand Permanent Mounting Tape to tape these together in layers.


Line up your bottom corners to mount these on top of one another,
keeping the uncut copy in the back and layering tallest to shortest.


Isn't it so fun and whimsical? I'm really happy with how it turned out. If you'd prefer not to frame it, you could lean it in a shelf as is...but with the work that went into this, I prefer to protect it in a shadow box frame. You'll need a shadow box since this piece has significant depth to it.

After framing my piece, I used Command™ Picture Hanging Strips to adhere my shadow box to the wall. Y'all, I've spent the past two months painting this new house of ours from top to bottom, and I want to protect these walls as much as possible.

I love these Command™ Picture Hanging Strips and have used them in other areas of the home, too. They're definitely a fave. They hold on strong, but come off nice and clean. Perfect for damage-free hanging.

No matter what kind of craft you're creating or task you're finishing, Scotch® Brand has you covered from tapes to adhesives and more.


This is so cute! My friend has a city theme in her son's room & this would be perfect.
ReplyDeleteThis is so cute and way more simple that I thought it would be! I have the perfect picture in mind to make this with!
ReplyDeleteThis would be so cool to have in my house! I think I am going to have to try this!
ReplyDeleteWhat a great little DIY project. Looks like fun...and looks awesome on the wall too.
ReplyDeleteThat is really cool how you make it 3-D!
ReplyDeleteThat is awesome! Frug-Elegant Artwork just the way we love it ;-)
ReplyDeleteWow! That's so cool looking! I love the colors.
ReplyDeleteThis is such a creative idea! I love to make wall art and I have never thought to make something like this.
ReplyDeleteI love this! I never would have thought to make something like this in 3d, now my wheels are spinning!
ReplyDeleteSo clever and love this, could make it look like your home city.
ReplyDeleteSuch an awesome idea!
ReplyDeleteYou did such an amazing job. It's very creative and would add a pop of fun and color to any room. My kids would love something like this hanging on their wall. :) #Client
ReplyDeleteWhat a creative idea, I love this!
ReplyDelete