This post for a DIY Frayed Fabric Bunting contains affiliate links. I make a small portion when these links are used, at no additional cost to you.
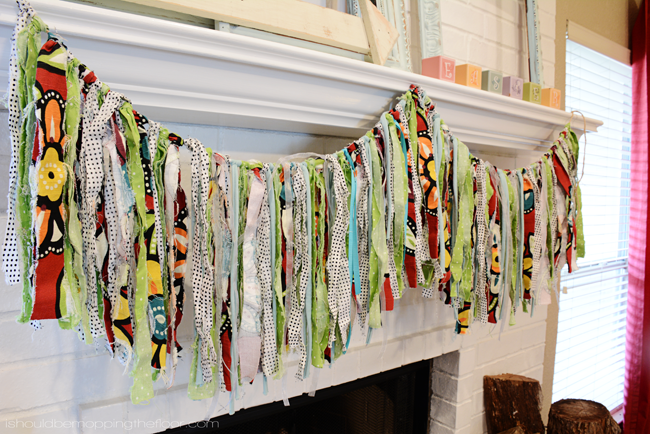
This DIY Frayed Fabric Bunting is an easy way to add a touch of color, loads of texture, and vintage fun to any room or even party space! Plus it's a super simple craft that anyone can do.

I originally posted this as a guest post on a blogger friend's site a year ago or so. However, whenever I host a party at the house or post a pic of this thing on Instagram, people ask how I made it. I thought it would be fun to include the tutorial (with some newer pics, too) over here for reference.
I’m over the moon in love with the whole bunting concept. It all started in college when my roommate’s mom made her some cute frayed fabric bunting for her window. She taught us a simple to trick to make it all vintage-y and fun…and frayed! Check out the tutorial below>>>
DIY Scrap Fabric Bunting

This one didn’t cost me a dime, either. I used some scrap fabrics from around the house. And I love that it has all of the colors from all over my house now.
How to Make a DIY Frayed Fabric Bunting

Supplies
- several mis-matched (or coordinating…your call) fabrics (The amount totally depends on how long you’d like your bunting to be. I used three yards of fabric and an old t-shirt (because I needed some blue).
- ribbon (I added this or additional texture)
- jute twine to string
- additional supplies: scissors, washer/dryer
Directions

- I cut my fabrics in strips of 1×29 inches.

- Cut up all of your fabric in this manner…even your t-shirts if you decide to use them.

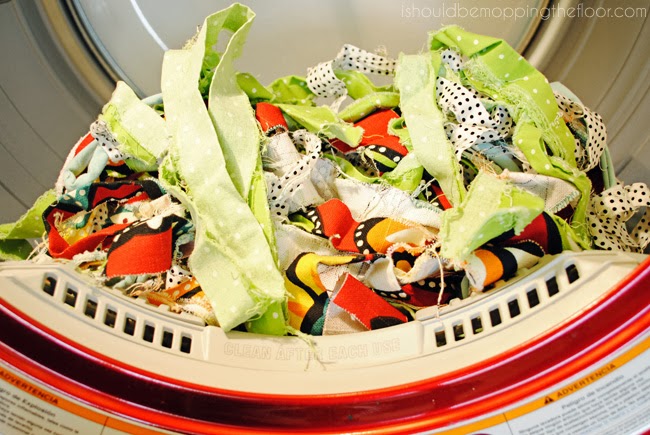
- Then…the trick to fraying them: stick them in the washer for a normal cycle (no fabric softener).
- Then pop them into the dryer (normal cycle as well). They come out in a fluffy, frayed pile of fun! Some pieces may be super frayed and may need a lil’ haircut. And don’t iron them or anything…I think the wrinkly-ness adds to the vintage look this has.
In my opinion, it’s easier to wash the strips before they’re tied on to the rope. They can tangle up when already tied.

- You’ll use a simple Girth Hitch Knot (this sounds way more complicated than it is). And to be clear, I straight-up Googled that. I didn't want to give the impression that I'm well-versed in knottage. I try, but...yeah. Google. It’s a "pull-through knot". In the above photo, you can see the tails being "pulled through" the loop on top of the twine.
- Repeat with all of your strips until you get your desired length.


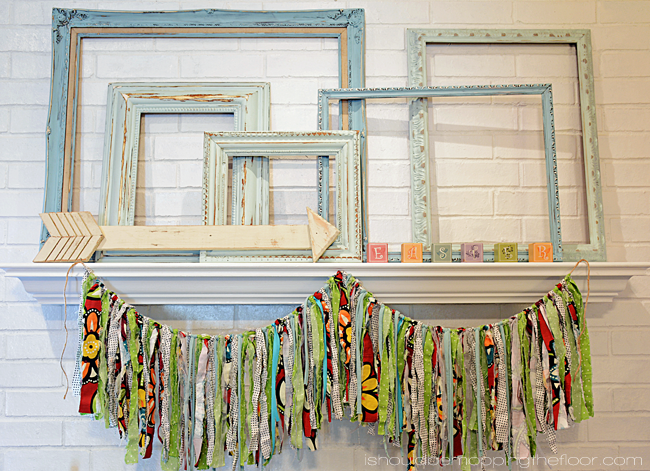
Here it is on this year's Easter mantle.
I went a bit Simple Simon on this one. These are the frames I showed on my Instagram feed a few weeks back that I scored at a local flea market. I painted them various shades of blue. Every time my mom comes over she asks when I will put artwork in them {she doesn't always get what craziness goes on in this head of mine}. I also found that arrow at a cute junk shop up the road in Waco called Junque in the Trunk.

More Fabric Crafts
- This Mason Jar Pin Cushion Project is such a classic craft, with an adorable outcome. These make wonderful gifts.
- And my Frayed Edge Bunny Pillow is a sweet one...especially for the springtime.
- If you enjoy sewing, you'll probably enjoy putting together this Travel Tea Bag Caddy.
- And these DIY Feathers from Fabric Scraps from Pillar Box Blue are so realistic! What a neat project.
- These Covered Button Bobby Pins from Cut Cut Craft would be so pretty as gifts or favors.
- Oh, and you'll flip for these sweet Holly Go Lightly Sleep Masks from PMQ for Two. Adorable!


No comments:
Post a Comment