This Mothers Day DIY Hoop Art post contains affiliate links. I make a small portion when these links are used, at no additional cost to you.
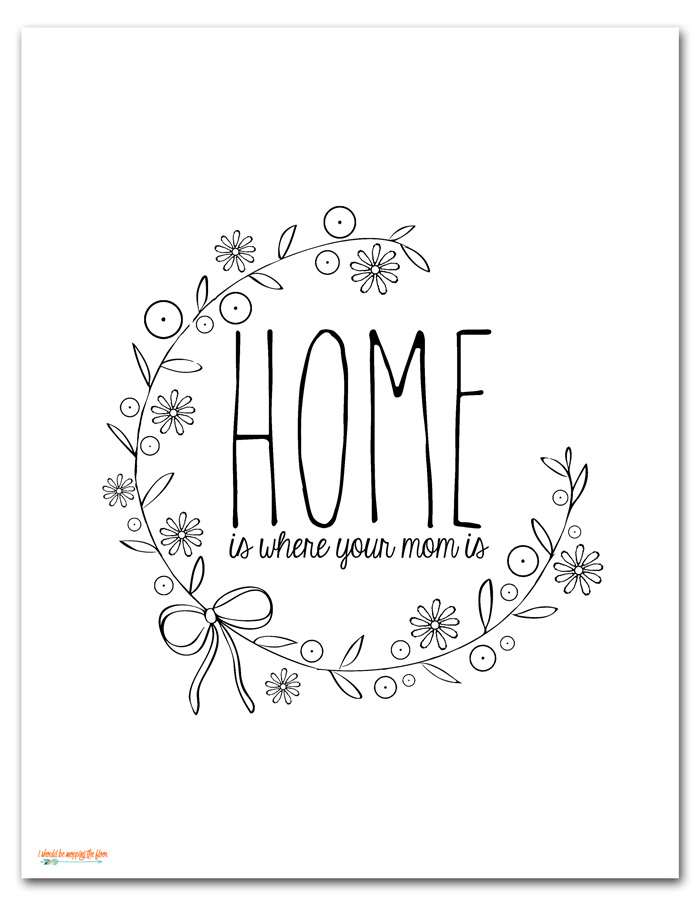
Ready for a sweet Mothers Day DIY project? This hoop art will totally bring a smile to mom's face and add some love to her decor. The free pattern for this Mothers Day DIY Hoop Art is available below, along with stitch explanations and more.
This Mother's Day Hoop Art has been in the works for a few weeks now. I've had to keep moving it to the back burner when other things came up...but I'm so happy it's done! It is probably my most involved hoop so far. But, the fun stitches and patterns were totally worth it. See all of the details and grab the free pattern for this Mothers Day DIY Hoop Art below.
Mothers Day DIY Hoop Art
If you're looking for the sweetest hoop gift for mom, I've got you covered. This floral-laden Mothers Day DIY Hoop Art is perfect to celebrate the lady of the hour (or day!). And the expression, Home is Where Your Mom Is, happens to be one of my favorite Mother's Day expressions.
I created this hoop pattern a couple of weeks ago before I left on a trip to Utah. I get motion sickness with reading and such in cars and planes, but for some weird reason, I can stitch without issue. I kind of quickly put this one together so I'd have something to do on the plane. I ran off and left my green embroidery floss, though, so I did the whole thing backwards (I always find it easier to lay out my vine and leaves first, but had to improvise). Although that was a bit of a challenge, it all worked out in the end.
Download this Mothers Day DIY Hoop Art Pattern:
Grab this pattern here.If the above link doesn't work, please try this alternate one.
Supplies for Mother's Day DIY Hoop Art
- 8" embroidery hoop (this pattern is specifically designed for 8" hoops)
- white background fabric (I used one with a light polka dot pattern to it)
- erasable fabric pens (I LOVE the FriXion ones) or other design/fabric transfer tools of your choice
- PDF pattern
- various colors of embroidery floss (I used ones from this DMC Variety Pack)
- embroidery scissors
- embroidery needles
How to Create this Mothers Day DIY Hoop Art
- Download the free Mothers Day DIY Hoop Art Pattern.
- Load your white fabric into your hoop.
- Use your favorite method to transfer your pattern to your fabric. Personally, I'm old school and transfer with a fluorescent light and my favorite FriXion Pens (I can get all of the details a bit better this way, in my opinion). These pens erase with the steam of an iron.
- Start stitchin'! You can see the stitches I used on this Mothers Day DIY Hoop Art below.
- Once finished with stitches, trim excess fabric and finish off the back in your desired method (I use felt cut into an 8" circle, hot glued to the back of the hoop).
- Feel free to embellish with fun pom poms. I used these sweet pink pom poms and just hot glued them around the outer hoop.
Stitches Used in this Mothers Day DIY Hoop Art
- Round Flowers: Wagon Wheel Flowers (using this tutorial from Making Jiggy). Flamingo Toes has another excellent tutorial for these.
- Daisy Flowers: Lazy Daisy Stitches on Outer Petals, Satin Stitch on inside of flower. Needle N Thread has a great Lazy Daisy tutorial.
- Vine: Chain Stitch (or a connecting Lazy Daisy)
- Bow: satin/fill stitching
- Lettering: backstitch. Purl Soho has a great backstitch tutorial.
- Leaves: I used my Simple Embroidery Leaves tutorial.
My hoop is definitely not perfect...but I know my mom will love it! Be sure to grab one of my free printable Mother's Day cards to pair with this hoop art.
And see how this Mothers Day DIY Hoop came together in my video below:
And see how this Mothers Day DIY Hoop came together in my video below:


No comments:
Post a Comment