This post for a Lined Zipper Pouch Tutorial contains affiliate links. I make a small portion when these links are used, at no additional cost to you.
If you're intimidated by sewing zippers, this lined zipper pouch tutorial is perfect for you. It makes a darling gift for any teacher or student. I've also included a coordinating free printable gift tag you can include when giving this fun pencil pouch. Don't let the schoolness of this particular tutorial keep you from trying it. In different fabrics, a pouch like this is perfect as a cosmetics bag. I also use one for all of my chargers when I travel. Check out this complete lined zipper pouch tutorial below.
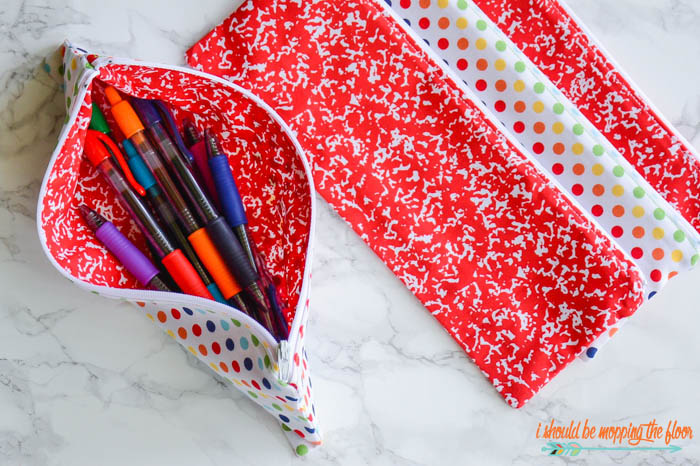
I'm kind of ecstatic about how cute this pencil pouch turned out. I lucked into this fun composition notebook paper fabric and it kind of took on a life of its own. I alternated the lining and outer fabrics on each pencil pouch to make them even more fun. Honestly, I couldn't stop making these, so I just reversed it to keep things interesting. See this complete Lined Zipper Pouch Tutorial below.
Lined Zipper Pouch Tutorial
These little pouches are so versatile and functional. The lining makes them more durable...to last through the entire school year (hopefully!). And truthfully, they're actually quite fun to make.

Lined Zipper Pencil Pouch Supplies:
- 2 pieces of outer fabric cut in 4"x 11" pieces
- While the red and white composition notebook fabric is tough to find, I did locate the black and white version of the fabric here on Amazon.
- 2 pieces of lining fabric cut in 4"x 11" pieces
- The colorful dotted fabric is from Riley Blake (called Riley Blake Dots).
- 1 10" zipper (the sizes of the fabric pieces are based on the zipper size. A pen or pencil pouch usually has a 10" zipper to make it easier to place the pens inside, so that's the best zipper for this particular project.)
- Grab a pack of 10" black and white zippers here on Amazon.
- coordinating thread
- straight pins or wonder clips (grab a pack here on Amazon), binder clips work, too
- zipper foot for your sewing machine (these come standard with most machines)
How to Construct Your Lined Zipper Pouch:
For this tutorial, I'm showing the lined zipper pouch with the red composition notebook print as the outer fabric and the polka dotted fabric as the lining fabric.- You will start by laying one piece of lining fabric face up.
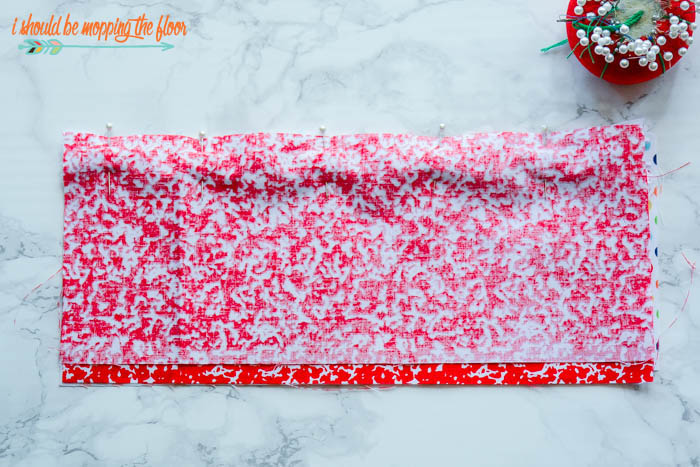
- Place the zipper on top of the lining fabric, lined up to its top edge (pictured above).

- Lay one piece of outer fabric face down on top of the lining and zipper. Make sure all pieces are lined up to the top evenly.
- Pin those layers in place (pictured above).

- Place the zipper foot on your sewing machine. These allow you to get as close to the zipper as possible when sewing.
- In order to navigate around the zipper pull you've sandwiched in your fabric pouch layers, you'll start sewing about an inch down from the pull...don't worry, we'll go back and finish the top in a bit. But, don't start at the very top where the pull is...start under the pull.
- Sew a simple basic stitch all the way down to the end (with backstitching at the beginning and end), with a quarter of an inch spacing from the edge.
- Remove the pin and open up the "unsewn" part of this.
- Unzip the zipper a few inches.
- Then lay all of the layers back into place.
- Go back to your sewing machine and stitch that area up (the zipper can't get in the way since it's pulled all the way down now). Be sure to backstitch at the beginning and end of your sewing.

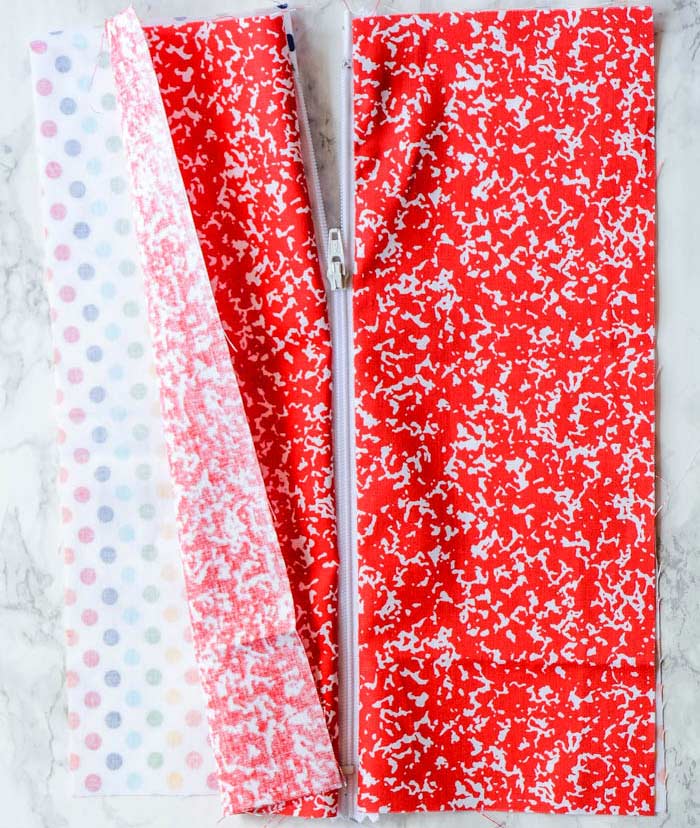
- Pull the red fabric back into place and start your layering again. You'll lay one lining piece down, then top with the sewn zippered part. Then on top of that lay one more outer layer (face down, as pictured above).

- Pin all of these layers into place. Once again, sew this all together. This time the pull will be at the other end. You'll start sewing normally, and then stop an inch before the zipper pull.
- Open the fabrics and pull the zipper down and then go back and finish sewing that seam.

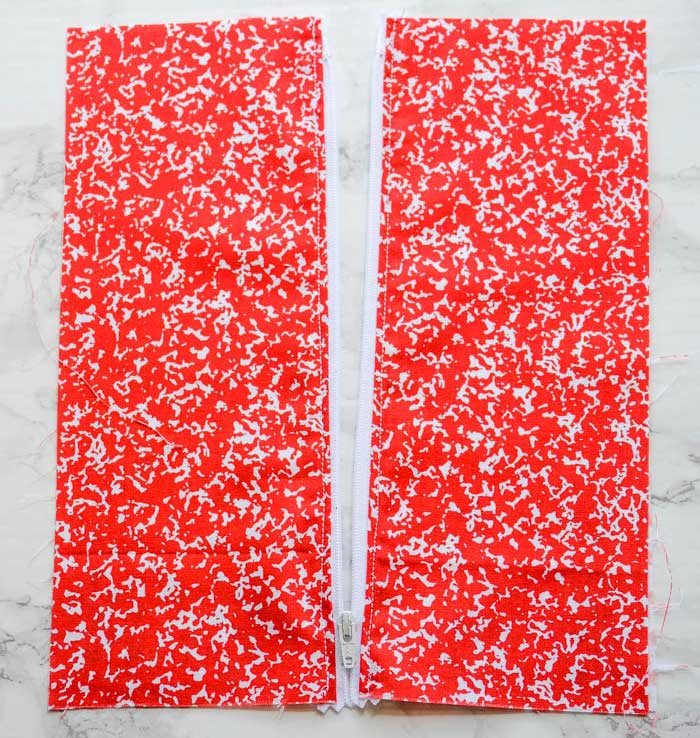
- Open everything up and you should have a nice, functioning zipper, with outer fabrics and lining fabrics in place.
- Head to your ironing board and iron away from your zipper, carefully pulling your fabric as taut as possible so it lays nicely in the end. If you used a plastic zipper, use caution with the iron (you'll be super sad if it melts onto your pretty piece!).

Topstitching Next To The Zipper
Once your piece is ironed (don't skip that step...it's super important), head back to your sewing machine. You'll sew a nice top stitch on both sides of the zipper to give the pencil pouch a nice, polished look.- It's fun to use a contrasting color of thread so it will pop against the zipper. I used white thread on top of the red fabric for this stitch.
- Your zipper pull is far enough from this stitch, that you can just sew this top stitch normally without stopping to pull the zipper down.

Super important...unzip the zipper at this point!

- You're going to pull your fabric layers up to meet their counterparts (outer fabric with outer fabric, and lining with lining).

Finishing the Pouch
- Lay the pieces down to form a rectangle.
- You'll notice the whole thing is inside out. It takes a little finagling, but make sure your zipper is laying towards your lining pieces. This is tougher on the end where the pull is (plus the zipper is on the inside of all of this), so just fiddle with it until the zipper is all pulled toward the lining.
- Clip with binder clips (or sewing clips if you have those) on each end to keep the zipper from moving (as pictured above).
- Pin around the outer edge. But, be sure to keep a few inches "open" on the lining side. As you can see in the above photo, I have a few pins going the opposite way of the other pins over on the lining's edge. Don't sew that area closed. You will, however, sew all the way around the entire rest of your piece (I start and stop at the beginning and end of the opening part). You need to leave that spot open to be able to pull the entire piece rightside out.

Sewing the Lining Closed
- Head to the sewing machine and sew around that perimeter, except for the opening area (as mentioned above). You'll do a small backstitch where you start and finish (you can see mine in the below photo). There is a lot of bulk where the zipper is. I take my foot off the pedal and hand crank over these spots...careful to avoid the mechanical part of the zipper.

- Once the perimeter is sewn (except that opening, as you can see above), clip the corners (all four). This will give you nice points on your finished pencil pouch.

- Reach your hand through the opening of the lining and pull the entire pouch out. I use a dullish-pointy object to push out my corners at this point.

Your zippered pouch is almost done!
- Before putting the lining back in place, carefully close it on itself and stitch it closed (either by hand or carefully on your machine).
- Then push the lining into place.

Give your finished pencil pouch a nice press and it's good to go. Now you can fill your pencil pouch up with your pens and pencils...or whatever else you'd like to use this pouch for.

For extra fun, I added a couple of goodies to the zipper pull. My DIY Pom Pom Apple is a great addition to the pull. And, of course, these free printable tags coordinate perfectly.

Looking for More Small Zippered Bag Tutorials?
- You'll love my Boxed Toiletry Bag because it has such a great shape to it. It holds a lot of stuff and is my go-to bag for every trip.
- I also have a Small Cosmetic Bag with a Zipper that is a simple project to sew.
- I've always loved this Canvas Pencil Pouch from Noodlehead.
- This smaller Pencil Pouch from Craftiness is Not Optional is really fun!


I'm usually not enthused about sewing in zippers, but with a project like this I think that I could do it. I like the marbled lining and how it looks like a composition book. You are definitely back to school ready!
ReplyDeleteThanks so much, Melanie! Yes, zippers can certainly be intimidating. I agree!
DeleteThis looks so easy that maybe I could even do it! This post is so helpful and the lining looks so beautiful!
ReplyDeleteI love this idea. I need one of these for all of my pens i buy for my paper planner. I need to learn how to sew!! lol!
ReplyDeleteThanks so much, Censie!
DeleteThese are really cute and such a great idea! I wish I could sew because these would be great to carry my pens back and forth from the office to home. Those pens are some of my favorites. They're the kind my job provides and I love them.
ReplyDeleteThank you so much, Kimberly! Yes, they're definitely my favorite pen, too!
DeleteOh I love this! The colors of the pouch are perfect and complement each other so well. I am a pouch girl for my pens too! It is the only way I can keep up with them in my purse. What a great teacher gift this would make!
ReplyDeleteThank you so much, Crystal!
DeleteMy daughter is all about these things. She makes some out of her favorite tapes and has a bunch all ready for school. I love when she is creative and crafty, it is really inspiring to me as well. I love to create things that are useful like this ideas so much fun!
ReplyDeleteYour daughter sounds like a girl after my own heart!
DeleteMy Mom also likes to ad a ziplock bag in the middle for pens. I just love using this for school!
ReplyDeleteThat's a smart way to do it...especially if a pen ever busts!
DeleteOh, these are so darn cute! A good friend of mine bags like these and I love them! Sewing is the one thing I haven't tried yet and I think I should. It looks fun and I love creating things!!! I totally want the red bag! Its like a marble book!
ReplyDeleteThanks so much, Amanda! You should totally dive into the sewing world...it's addictive!
DeleteThis is a super cute tutorial for back to school! I love pens so this is right up my alley. I need to dust off my sewing machine and give this one a try! So cute!
ReplyDeleteA very cute idea for my children's sewing class. Thanks
ReplyDeleteOh that would be a great place for these! Thanks, Pam!
DeleteHowdy! I'd just like to say I've followed you for a couple years now and truly appreciate your dedication to doing things right!! Your tutorials are "spot on"! And this zippered pouch which I adore is complete with easy to understand language and perfectly placed pictures!! Who is your photographer btw!?
ReplyDeleteThanks for always being a time of refreshment for me! Jacquie J.
Jacquie, your comment truly did my heart good! Thank you so much for your kind words...they mean so much to me! I actually take my own photos. It's taken me awhile to learn the ins and outs of photography, but it's very enjoyable to me. I think the photos have improved since I moved my office/studio space into a front room of my house with really large windows. The room gets really nice, soft morning light that makes a big difference. Again, I can't thank you enough for your sweet comment! xoxo
DeleteThese are adorable! I would love to make some for organizing my purse in addition to making them for the kids. Thanks for the awesome tutorial!
ReplyDeleteYes, these would be great for purse organization for sure!! Thank you so much!
DeleteThank you so much, Gemille! I was like that as a kid, too!
ReplyDeleteLove your cute pouches. I never thought of making them for my pens. I have tons and tons and tons of pens (for my planner as well as coloring books), but the G2 pens are my go-to pens every time. Love them! I have to admit I buy a pack whenever I see a good sale because I'm terrified of running out, and then they will stop making them!
ReplyDelete