This post for a Drink Station contains affiliate links. I make a small portion when these links are used, at no additional cost to you.
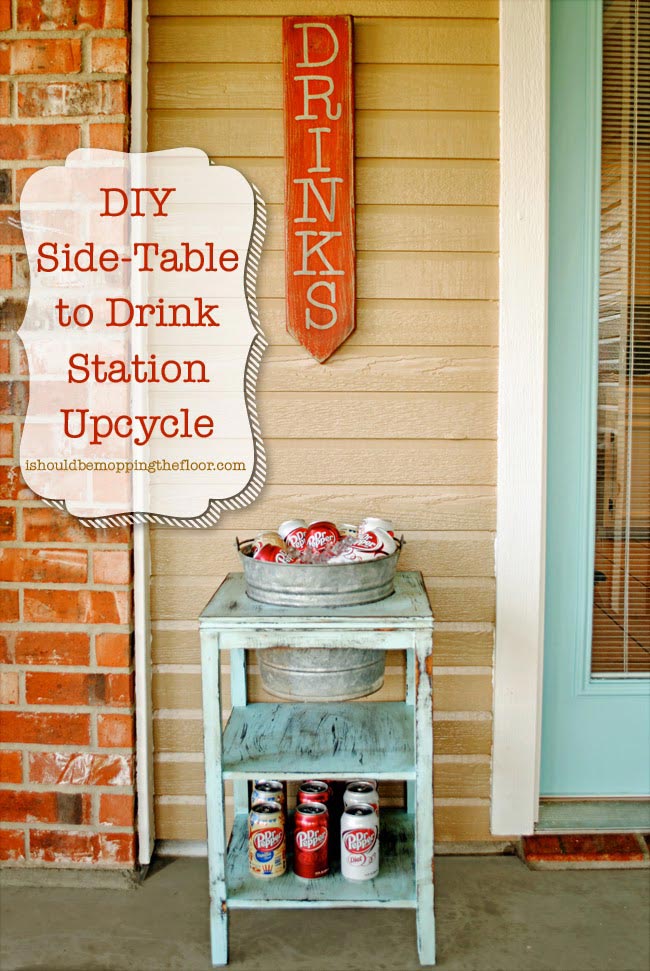
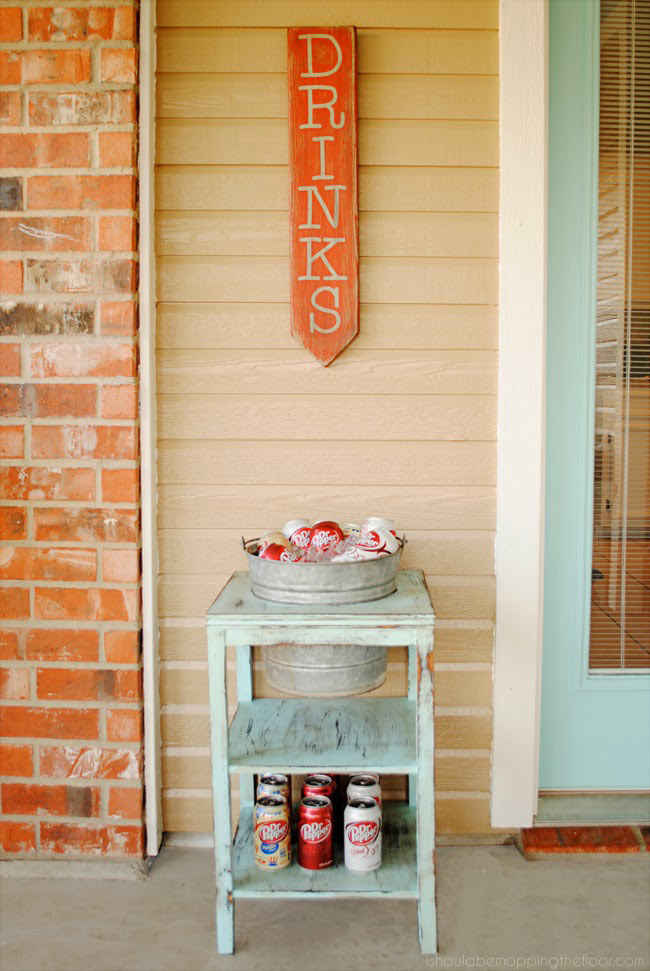
This simple, build-it-yourself Drink Station was a fun upcycle from a thrift store side table. It was a project that took less than an afternoon to complete and will function for us for years to come. Plus, it's just a CUTE little addition to our back patio. See how this project came together below.
I had really been itching for something attractive and vintage-y to hold drinks for guests on our porch (even if it's just juice boxes for our tiny guests, right?). I originally planned to build something, but then stumbled onto a great side table at Goodwill. And I realized that this is a piece that could be easily created by a number of old side tables, nightstands, or similar pieces anyone could find. So, I thought a tutorial would be helpful.
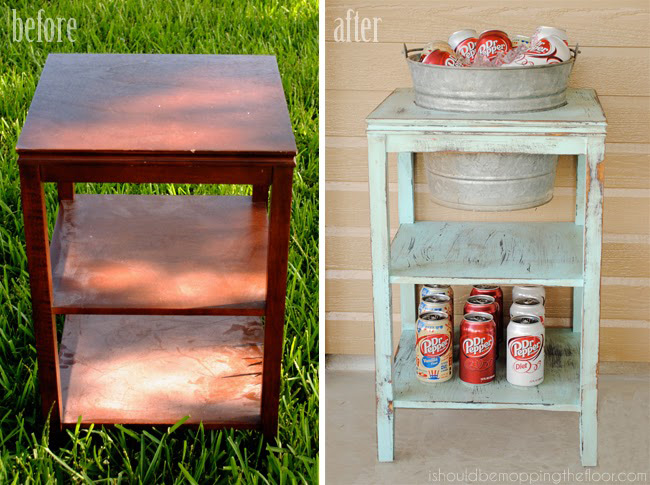
See the transformation below>>>
DIY Drink Station
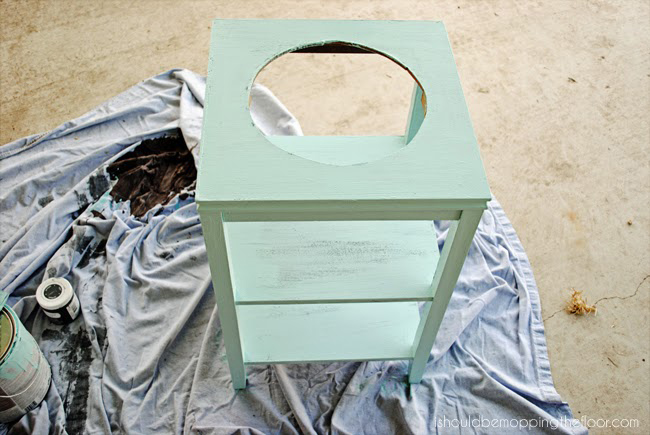
This little beverage spot started with the below side table.
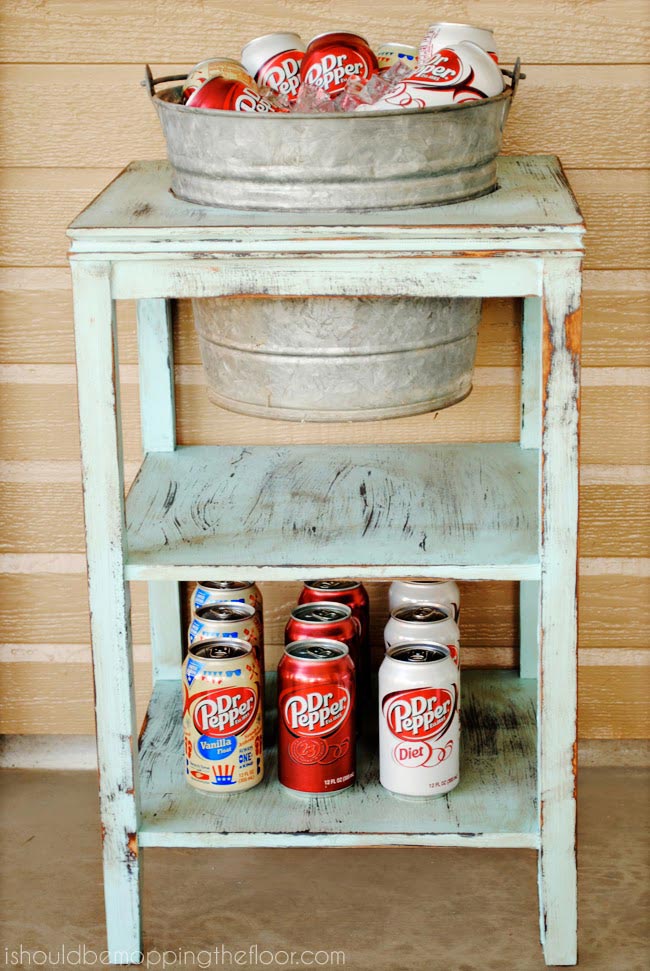
And wasn't Goodwill just precious? They went and threw in all that dust at no extra charge. After, I cleaned it up and painted...I was super excited to have a funky vintage drink station for the back porch. I love how there's a shelf for the extras or even glassware, too. I shared the paint tutorial below, as well.
Supplies to Build Your Own Drink Station:
- old side table or nightstand or similar
- galvanized metal bucket (I used one that I had on hand, but I find these at dollar stores or you can even purchase one here on Amazon).
- Be sure the top rim of yours is slightly smaller than the top surface of your table.
- paint supplies (listed below)
- sandpaper
- jigsaw
Drink Station Directions
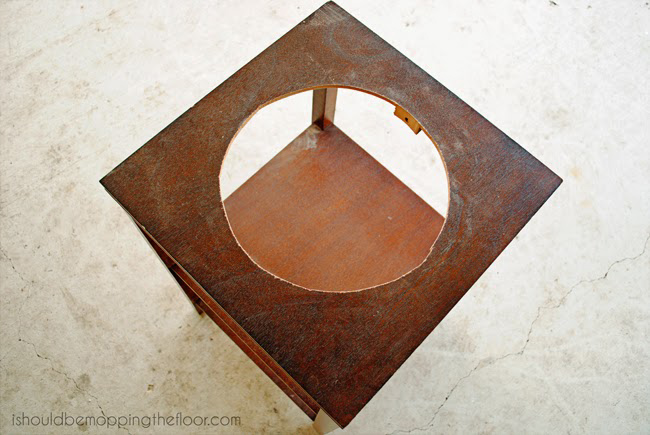
- Flip your bucket upside down and trace it on the table. Now, create a circle about a half of an inch to an inch inside that original traced line. You'll want your hole to be slightly smaller than your rim, so it doesn't slide right through.
- Cut out the smaller circle size with your jigsaw.
My "Sentimental" Bucket
I ended up with a lot of old vintage buckets when my uncle passed away fourteen years ago...he had a bunch of them in his garage and my parents were going to toss them (wha?!?). I have plants in some of them and a whole lot still looking for good uses (fourteen years later). I'd love to tell you all about the summer we cleaned out my uncle's home, but that would probably require a numerous blog posts.
But, I will digress just a tiny bit. God rest his soul, after his death, we learned my uncle was a bit of a pack rat...which is putting it lightly. To give you an idea, we found my mom's antique crib from when she was a baby {and she was in her sixties when he passed away} tucked into the rafters of the garage. We found dozens of antique family furniture pieces, many (many) sets of china and so much more (it took three months to clean out the home completely). We realized, upon his death, why he never had anyone over. He was a precious man...but, he came to you (if you know what I mean). Nobody was invited over. Ever. And we quickly learned why. The entire three months were quite therapeutic for us as a family, as we worked together to process the entire thing, (as you can imagine, it was very overwhelming).
And of course, being the family junker (none of my relatives seem to share my adoration of all things flea-markety), a lot of it just went with me (they were ready to rent a dumpster and toss it all). But, we ended up salvaging a lot of stuff. I can just look around my home and see so many pieces that were from that summer. I've even refinished several pieces for my parents' home from that house, too (and now they don't think it was as crazy as it seemed at the time to save it all).
But all that to say...I have a lot of antique metal buckets. And this is how I used one.
Painting and Finishing
Supplies for Painting
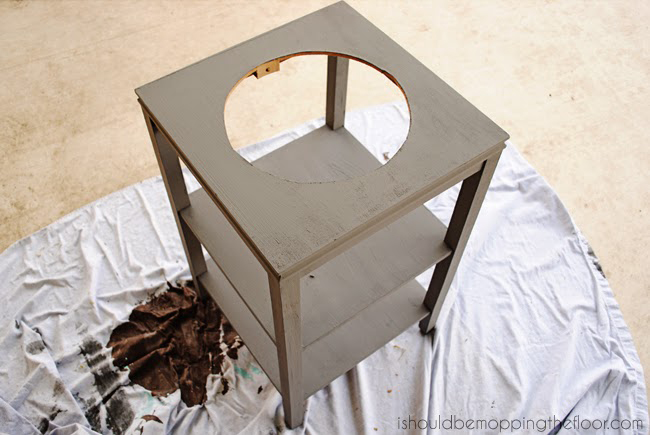
- base coat color of chalk paint (I used the darker grey, pictured above): You can grab it here on Amazon.
- wax painting puck or wax taper candle
- These wax painting pucks (originally from Miss Mustard Seed) don't appear to be readily available right now. A simple wax taper candle will work just as well.
- latex outdoor paint for top coat (in a lighter color than your base coat, if you want the base coat to show through in the weathering process)
- I used outdoor paint since our table would sit on the patio...I just used leftover paint from the patio area. itself.
- sand paper
- optional: spray sealer (I did not seal mine so it would distress itself even more, naturally)
Directions for Painting
- After cutting out the hole, I painted the piece in a dark grey chalk paint. I didn't want to sand or anything, so chalk paint was an obvious choice.
- I used a wax puck along the edges of the piece, to keep the next layer of paint from sticking very well to those spots. Again, you can also use a taper candle in the same manner.
- Then, paint your top coat. I did a semi-dry brush to not have the paint stick everywhere and show some of that darker base coat through.
This is a new shade of aqua that I used on the porch ceiling and back door recently. We actually painted the entire porch...ceiling and floor included. You can read all about How to Paint a Porch Floor (so it never peels) here. That post has all of the various colors we used, too.
- After the paint dries, sand with the grain (I use this palm sander, but you can certainly sand it by hand, too).
- On my piece, since the darker color was the base coat, it showed through really well. I didn't top coat it since I used exterior paint and wanted it to weather even more, naturally.
- Slide your bucket into your finished table.
- It's great to be able to pull it out and refill as needed (or dump the ice).
Obviously, we're from Texas, with all the Dr. Pepper! But this drink station would also be great for chilling a couple of bottles of wine or alcohol, bottled water or juice boxes for kids, or whatever your heart desires.
Cheers!
More Drink Station Ideas
- Dinah, from DIY Inspired, created a really neat DIY Drink Station using stacked wooden crates. It's super clever and perfect for backyard gatherings, too.
- And check out these 5 Ways to Create an Outdoor Beverage Station from Becky at Infarrantly Creative.
- If you don't have an old side table like mine, check out Laura's Beverage Station Tutorial over on Inspiration for Moms. She shares how to build your own from scratch.
- And Lulu the Baker has a great set up for a Portable Drink Station that you can set up just about anywhere.
- This DIY Drink Station from Ugly Duckling House is so nice and large if you're having a big gathering.





A family friend allowed us to go through her father-in-laws house after the family went through and took the big visible stuff they wanted. The girls and I dug through the cabinets and closets {that were packed full!} and we found a bunch of stuff that we just treasure. The best part was that the girls found an entire cabinet full of vintage crystal that the family never knew about! The couple had been a very simple couple, not in to fancy things, so every time someone gave her a piece of crystal she packed it away and hid it. The family came and there was just enough pieces for each of them to take one home!!
ReplyDeleteThis is just too cute! And I love the vintage feel to it!
ReplyDeleteLove this! Super cute.
ReplyDeletesuch a cute idea! love it!!
ReplyDeleteKristi, that is SO cute and genius! I even have a table/stand almost just like that in need of a makeover. Pinning to share (and try ASAP!)
ReplyDeleteWhat a great idea! I love this...so cute and useful! Thanks for sharing!
ReplyDeleteLove this girl! Thank you so much for linking it up to The Creative Collection Link Party!
ReplyDeleteThe drink station is so useful.Thank you for your diy tutorial.
ReplyDelete